Neural Chip Design [2/4: Golden Model]
This is a series of articles [overview] outlining the workflow of 15 steps, which I developed over the past few years through building my own DNN accelerator: Kraken [arXiv paper].
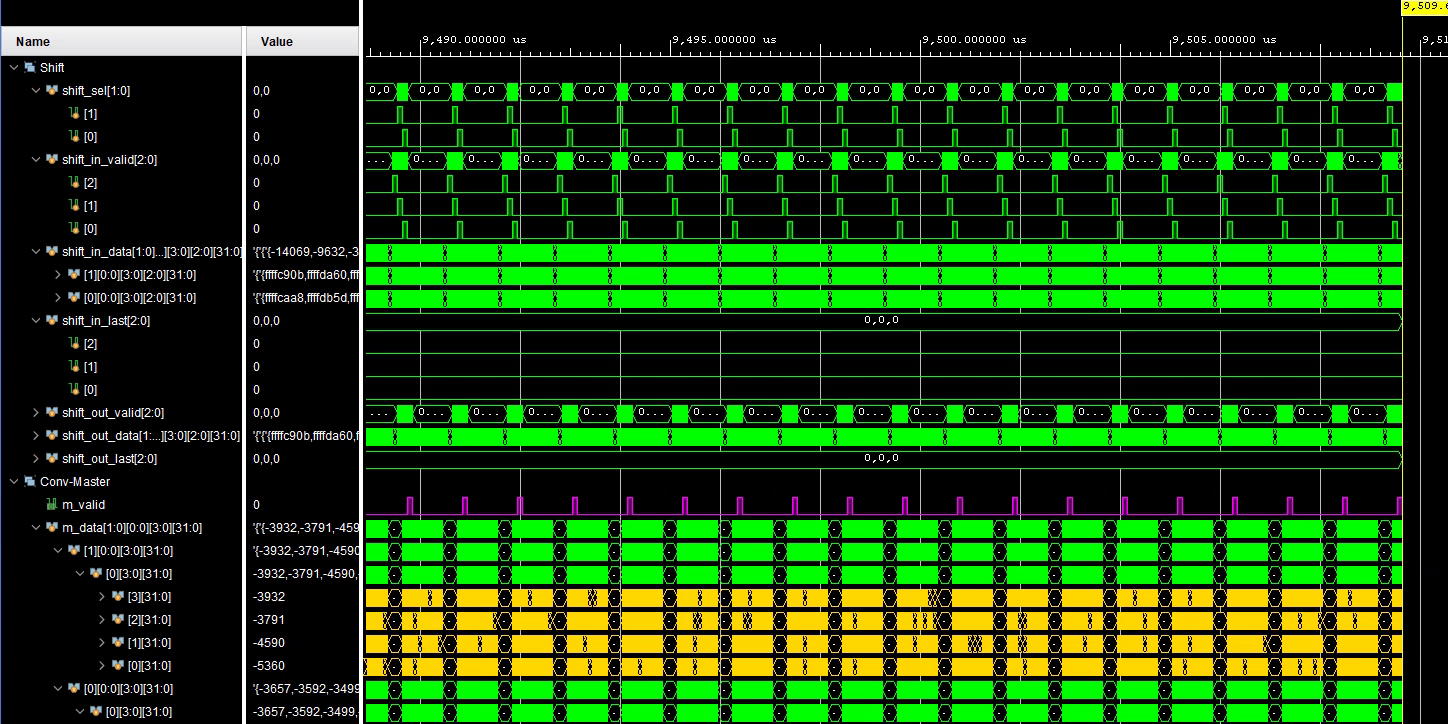
Golden Models are essential to hardware (FPGA/ASIC) development. They model the expected behavior of a chip using a high-level language, such that they can be built relatively fast, with almost zero chance of error. The input and expected output test vectors for every RTL module are generated using them, and the simulation output from the testbench is compared against their 'gold standard.'
I first obtain pretrained DNNs from PyTorch / Tensorflow model zoo, analyze them, then load them into the custom DNN inference framework I have built with NumPy stack to ensure I fully understand each operation. I then generate test vectors from those golden models.
Steps:
- PyTorch/TensorFlow: Explore DNN models, quantize & extract weights
- Golden Model in Python (NumPy stack): Custom OOP framework, process the weights, convert to custom datatypes
1. Tensorflow / PyTorch
Tensorflow (Google) and PyTorch (Facebook) are the two competing open source libraries used to build, train, quantize and deploy modern deep neural networks.
Both frameworks provide high-level, user-friendly classes and functions such as Conv2D, model.fit() to build & train networks. Each such high-level API is implemented using their own low-level tensor operations (matmul, einsum), which also can be used by the users. Those operations are implemented using their C++ backend, accelerated by high performant libraries like eigen and CUDA. Once we define the models using Python, the C++ code underneath pulls the load, making them fast as well as user-friendly.
1.1. Download & Explore Pretrained DNN Models
As the first step, I obtained the pretrained models from either Keras.Applications or PyTorch Model Zoo.
import tensorflow as tf
from tensorflow.keras.applications import VGG16

vgg16 = VGG16(
    include_top=True,
    weights="imagenet",
    input_tensor=None,
    input_shape=None,
    pooling=None,
    classes=1000,
    classifier_activation="softmax",
)

vgg16.save('saved_model/vgg16')
vgg16.summary()import torch
model = torch.hub.load('pytorch/vision:v0.10.0', 'alexnet', pretrained=True)
model.eval()
torch.save(model, "alexnet.pt")1.2. Build Models & Retrain if needed (PyTorch)
PyTorch is more intuitive, pythonic and bliss to work with. I use it to build new models and train them if needed.
import torch
import torch.nn as nn
import torch.nn.functional as F
import torch.optim as optim
from torchvision import datasets
from torchvision import transforms as T
from torch.optim.lr_scheduler import StepLR

H = 28
N = 32
device = torch.device("cuda")

class Net(nn.Module):
    def __init__(self):
        super(Net, self).__init__()
        self.fc1 = nn.Linear(H**2, 32)
        self.fc2 = nn.Linear(32, 10)
    def forward(self, x):
        x = self.fc1(x)
        x = F.leaky_relu(x,0.01)
        x = self.fc2(x)
        output = F.log_softmax(x, dim=1)
        return output

model = Net().to(device)''' Create Data Loaders to efficiently pull data '''
transform = T.Compose([T.ToTensor(), T.Lambda(lambda x: torch.flatten(x))])
dataset1 = datasets.MNIST('../data', train=True, download=True, transform=transform)
dataset2 = datasets.MNIST('../data', train=False, transform=transform)
train_loader = torch.utils.data.DataLoader(dataset1,batch_size=N)
test_loader = torch.utils.data.DataLoader(dataset2,batch_size=N)
''' Functions to Test & Train '''
def train(model, device, train_loader, optimizer, epoch):
model.train()
for (data, target) in train_loader:
data, target = data.to(device), target.to(device)
optimizer.zero_grad()
output = model(data)
loss = F.nll_loss(output, target)
loss.backward()
optimizer.step()
print(f'Train, epoch: {epoch}, loss: {loss.item():.6f}')
def test(model, device, test_loader):
model.eval()
test_loss = 0
correct = 0
with torch.no_grad():
for data, target in test_loader:
data, target = data.to(device), target.to(device)
output = model(data)
test_loss += F.nll_loss(output, target, reduction='sum').item()
pred = output.argmax(dim=1, keepdim=True)
correct += pred.eq(target.view_as(pred)).sum().item()
test_loss /= len(test_loader.dataset)
print(f'Test, loss: {test_loss}, acc: {100*correct/len(test_loader.dataset):.0f}')
optimizer = optim.Adadelta(model.parameters(), lr=1.0)
scheduler = StepLR(optimizer, step_size=1, gamma=0.7)
''' Train for 50 Epochs '''
for epoch in range(1, 51):
train(model, device, train_loader, optimizer, epoch)
test(model, device, test_loader)
scheduler.step()
''' Save Trained Model '''
torch.save(model, "mnist_cnn.pt")1.3. Convert Torch Models to Tensorflow
However, the support for int8 quantization for PyTorch is still experimental. Therefore, for most of my work, I use pretrained models from Tensorflow, whose quantization library (TFLite) is much superior.
Some models, like AlexNet, are not found in Keras.Applications. Therefore, I load them from PyTorch Model Zoo and convert them to ONNX (the common open-source format) and then load them in Tensorflow.
import torch
from PIL import Image
from torchvision import transforms

model = torch.load('alexnet.pt')

input_image = Image.open('dog.jpg')
preprocess = transforms.Compose([
    transforms.CenterCrop(224),
    transforms.ToTensor(),
    transforms.Normalize(mean=[0.485,0.456,0.406], std=[0.229,0.224,0.225]),
])
input_tensor = preprocess(input_image)
input_batch = input_tensor.unsqueeze(0)

torch.onnx.export(model, input_batch, "alexnet.onnx",
input_names=['input'], output_names=['output'])# First install onnx2keras with: pip install onnx onnx2keras
import onnx
from onnx2keras import onnx_to_keras
onnx_model = onnx.load("alexnet.onnx")
k_model = onnx_to_keras(onnx_model, ['input'], change_ordering=True)
k_model.save('saved_model/alexnet')1.4. Quantize Models with TensorFlowLite
Following is an example of loading a float32 model (VGG16) from tensorflow's savedmodel format (1.1), testing it, quantizing it to int8, and testing & saving the quantized network.
import tensorflow as tf
filenames = glob("dataset/*.jpg")
'''
LOAD AND TEST FLOAT32 MODEL
'''
prep_fn = tf.keras.applications.vgg16.preprocess_input
model = tf.keras.models.load_model(f'saved_model/vgg16')
h = model.input_shape[1]
import cv2
from glob import glob
import numpy as np
def representative_data_gen():
for im_path in filenames:
im = cv2.imread(im_path)
im = cv2.resize(im, (h,h))
im = im[None,:,:,::-1]
im = prep_fn(im)
im = tf.convert_to_tensor(im)
yield [im]
images = list(representative_data_gen())
predictions = np.zeros((len(images),), dtype=int)
for i, image in enumerate(images):
output = model(image[0])[0]
predictions[i] = output.numpy().argmax()
print(predictions)
'''
CONVERT AND SAVE INT8 MODEL (STATIC QUANTIZATION)
'''
converter = tf.lite.TFLiteConverter.from_keras_model(model)
converter.optimizations = [tf.lite.Optimize.DEFAULT]
converter.representative_dataset = representative_data_gen
converter.target_spec.supported_ops = [tf.lite.OpsSet.TFLITE_BUILTINS_INT8]
converter.inference_input_type = tf.int8
converter.inference_output_type = tf.int8
tflite_model_quant = converter.convert()
import pathlib
tflite_model_quant_file = pathlib.Path(f"tflite/vgg16.tflite")
tflite_model_quant_file.write_bytes(tflite_model_quant)
'''
LOAD AND TEST QUANTIZED MODEL
'''
interpreter = tf.lite.Interpreter(model_path=str(tflite_model_quant_file))
interpreter.allocate_tensors()
input_details = interpreter.get_input_details()[0]
output_details = interpreter.get_output_details()[0]
images = list(representative_data_gen())
predictions = np.zeros((len(images),), dtype=int)
for i, image in enumerate(images):
image = image[0]
input_scale, input_zero_point = input_details["quantization"]
image = image / input_scale + input_zero_point
test_image = image.numpy().astype(input_details["dtype"])
interpreter.set_tensor(input_details["index"], test_image)
interpreter.invoke()
output = interpreter.get_tensor(output_details["index"])[0]
predictions[i] = output.argmax()
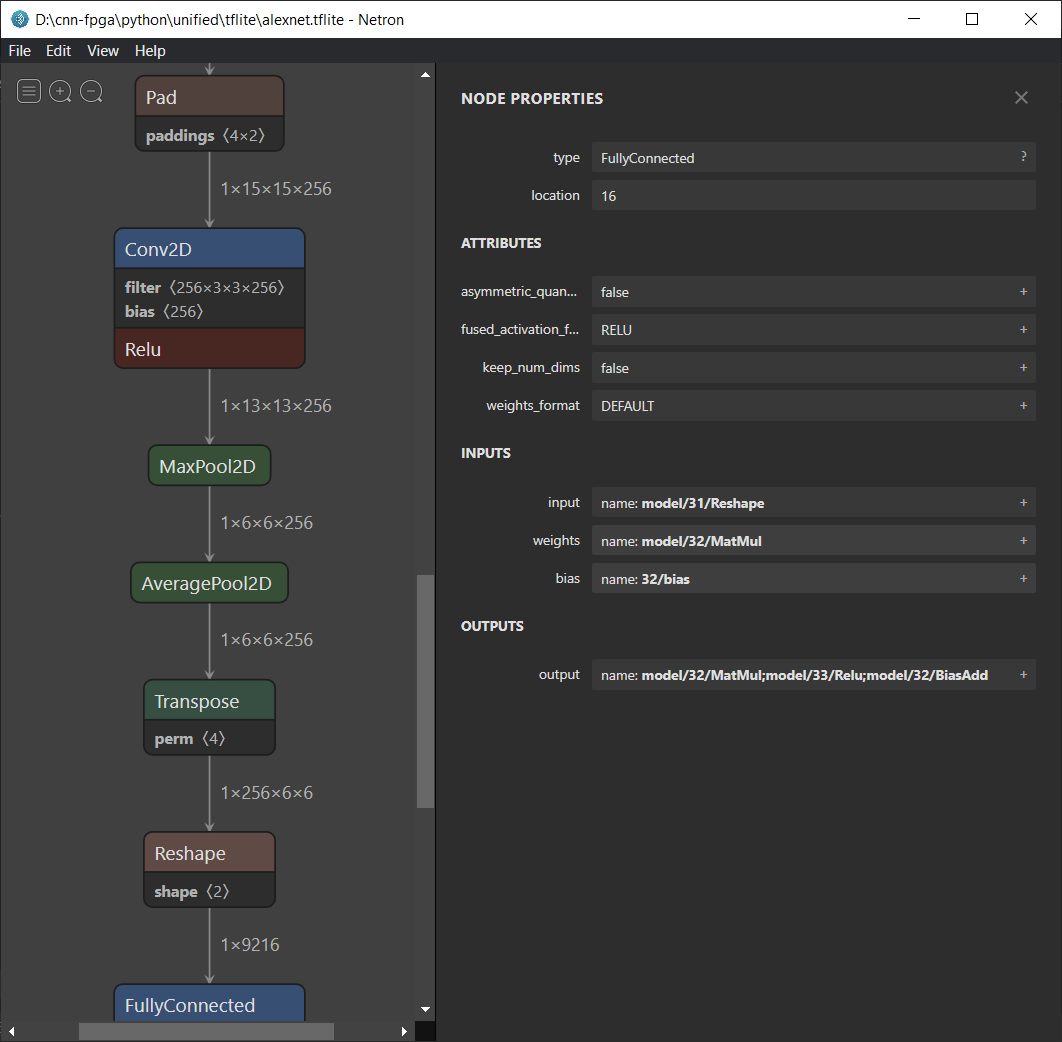
print(predictions)1.5 Explore Model Architecture
Netron is a great tool for opening tensorflow's 32-bit models (savedmodel), tflite's int8 models (tflite), pytorch models (pt), ONNX models, and more, to observe the architecture and tensor names.
2. Golden Model
Python (NumPy stack)
After obtaining the pretrained model, I need to 100% understand what operations are involved and how they are applied as data flows through the network. The best way to do this is to re-do it myself from scratch and obtain exactly the same results.
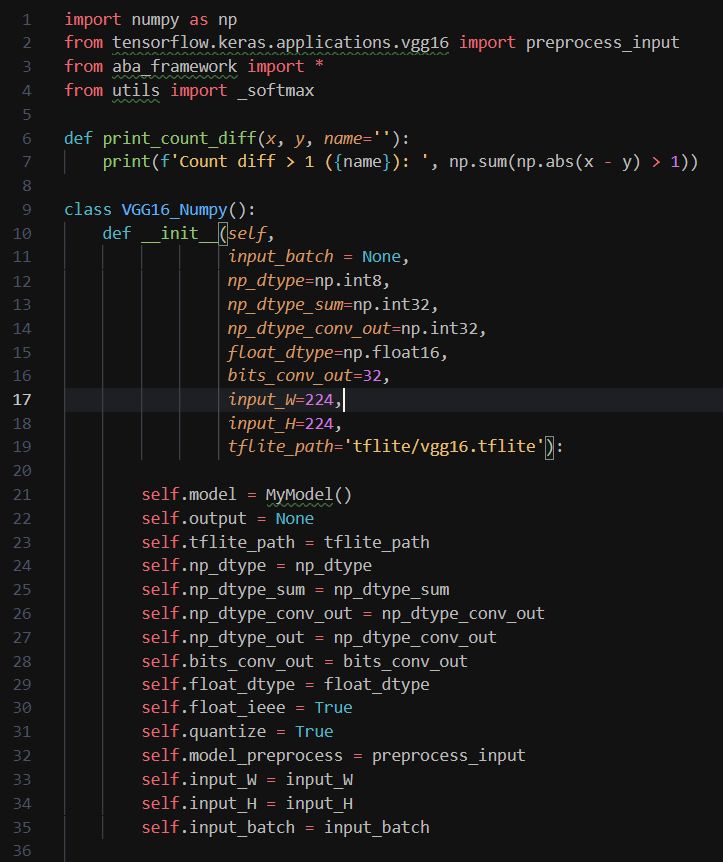
2.1. Custom Quantization Scheme

2.2. Custom Inference Framework (OOP, Python)
For this, I built a custom framework in Python. It is structured like Keras with the following classes, inheriting as follows:
- MyModel
- MyLayer
- MyConv
- MyLeakyReLU
- MyMaxpool
- MyConcat
- MySpaceToDepth
- MyFlatten
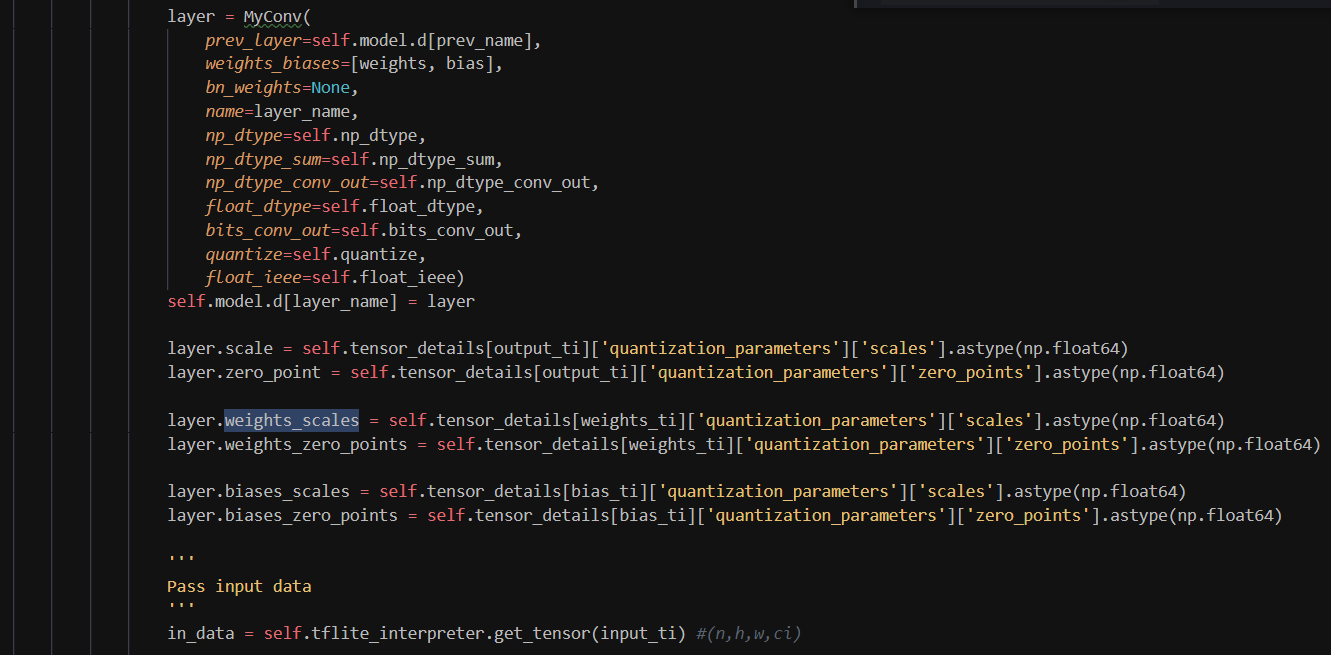
A MyModel object has a list of objects from MyLayer's children's classes. It's constructor extracts weights from tflite and sets them to the layers. A set of images can flow through the layers through a recursive call to the last layer. Following is the stripped-down version of the MyConv implementation.
class MyConv(MyLayer):
    def __init__(self,
                 weights_biases,
                 prev_layer=None,
                 bn_weights=None,
                 name='',
                 np_dtype=np.float64,
                 np_dtype_sum=np.float64,
                 np_dtype_conv_out=np.float64,
                 float_dtype=np.float64,
                 bits_conv_out=32,
                 quantize=False,
                 float_ieee=True):

        MyLayer.__init__(self,
                         name=name,
                         prev_layer=prev_layer,
                         np_dtype=np_dtype,
                         quantize=quantize,
                         float_ieee=float_ieee)
        self.np_dtype_sum = np_dtype_sum
        self.np_dtype_conv_out = np_dtype_conv_out
        self.float_dtype = float_dtype

        assert len(weights_biases[0].shape) == 4
        self.weights = weights_biases[0].astype(self.np_dtype)
        self.weights_flipped = np.flip(
            self.weights, [0, 1]).astype(self.np_dtype)
        self.kernel = self.weights.shape[0:2]
        self.in_ch_n = self.weights.shape[2]
        self.out_ch_n = self.weights.shape[3]
        self.biases = weights_biases[1].astype(self.np_dtype)

        self.fuse_bn(bn_weights)

        if self.quantize:
            self.clip_max = 2**(bits_conv_out-1)-1
            self.clip_min = -2**(bits_conv_out-1)

    def np_out(self, in_data):
        if self.quantize:
            in_data = self.in_data.copy().astype(self.np_dtype_sum)
            weights = self.weights.copy().astype(self.np_dtype_sum)

            self.np_out_data = self.conv2d_einsum(in_data, weights)

            self.np_out_data = np.clip(self.np_out_data, self.clip_min, self.clip_max)
            self.np_out_data = self.np_out_data.astype(self.np_dtype_conv_out)
        else:
            out = self.conv2d_einsum(self.in_data, self.weights)
            out += self.biases
            self.np_out_data = self.decode(self.encode(out))
        return self.np_out_data

    def fuse_bn(self, bn_weights, epsilon=0.001):
        self.gamma, self.beta, self.mean, self.variance = bn_weights
        self.epsilon = epsilon

        scale = self.gamma / np.sqrt(self.variance + self.epsilon)

        self.pure_weights = self.weights.copy()
        self.pure_biases = self.biases.copy()

        self.weights = self.weights * scale
        self.weights_flipped = np.flip(self.weights, [0, 1])
        self.biases = beta + scale * (self.biases - self.mean)

    @staticmethod
    def conv2d_einsum(img, kernel):
        pad_h = kernel.shape[0]//2
        pad_w = kernel.shape[1]//2

        out_batch = []
        for n in range(img.shape[0]):
            padding = ((pad_h, pad_h), (pad_w, pad_w), (0, 0))
            img_pad = np.pad(img[n], padding, 'constant')

            sub_shape = tuple(np.subtract(img_pad.shape, kernel.shape[0:-1])+1)
            shape = kernel.shape[0:-1] + sub_shape
            strd = np.lib.stride_tricks.as_strided
            submatrices = strd(img_pad,shape,img_pad.strides*2,writeable=False)

            out_batch += [np.einsum('ijkl,ijkmno->mnl', kernel, submatrices)]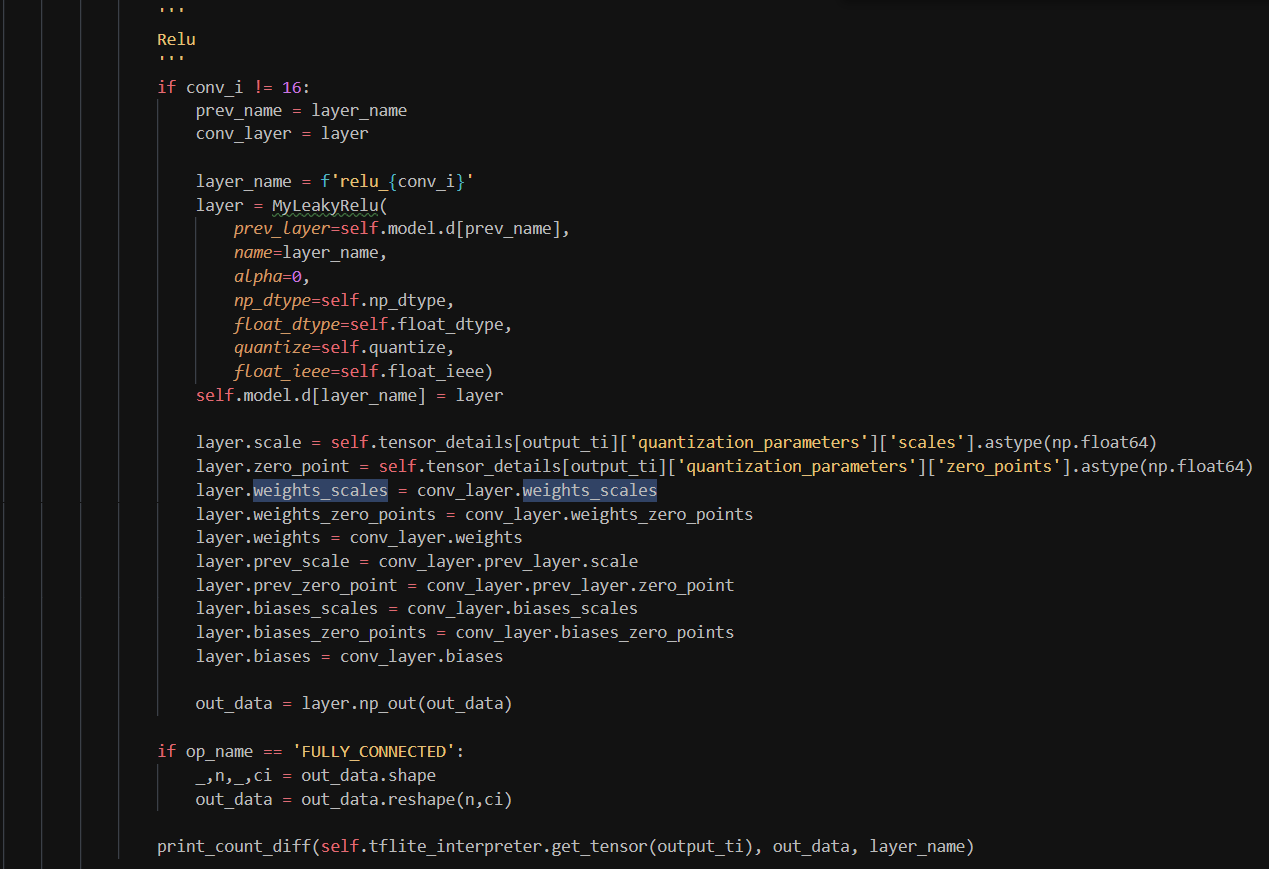
return np.array(out_batch)2.3. Rebuilding the model & Debugging
I then rebuild the model using the above framework, pass data and tweak things until I get the exact same output. That tells me I have understood all the operations going on inside the model.
Once I've understood the model inside-out, I start designing the hardware on the whiteboard.
Next:
 Abarajithan G